


How to Test Your E-Bike Battery: Expert Tips and Tricks
June 25, 2023
Any e-bike cannot function to its full capabilities without its battery. If you have a touring electric bike, your e-bike’s battery health and functionality are all the more important–your bike needs to ride and operate to its full potential for those longer rides.
A malfunctioning battery is one of the leading reasons why your electric bike is not working properly. When your bike is equipped with a lithium-ion battery, you need to regularly test and care for it. Here are some of our expert tips and tricks for testing your battery:
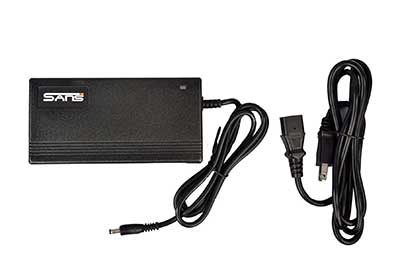
Invest in a Multimeter
The first step is to invest in a multimeter, as it will be necessary for all of the following steps. This tool is a small, portable probe used for measuring voltage, current, and resistance. We recommend a digital multimeter, as they garner more accurate results.
Testing Your Battery
Now that you have your multimeter, we can begin testing your battery’s health.
Connect Your Multimeter
To begin this step, make sure your battery is completely charged (at 100%) and remove it from your bike. The bike must have been at this full-charge level for six to eight hours. Next, insert the multimeter probes into the connector or port on your battery. Make sure you are not forcing it in or applying excessive pressure, as this can damage the battery or multimeter. Take your time to connect it.
Test the Charge
The majority of multimeters have an AC/DC readout function and a “battery test load” function. We don’t recommend using AC because this can overcharge your e-bike’s battery, so use DC instead.
This reading will tell you the battery’s ability to power up and the energy density necessary to communicate with the motor. Check your owner’s manual for the original DC number and compare it to your current reading. If it hasn’t deviated far from that original number, your battery is functioning as it should.
Test the Voltage
Next, switch your multimeter function to the “volts function.” This enables you to perform a voltage test. Refer to your e-bike’s manual to find out the voltage range for your bike’s brand. When the battery drops below a specific voltage reading, it will shut down to prevent damage to the unit. If your voltage is too low, it can indicate your battery is running down.
Invest in a Battery Monitoring System
Most e-bike batteries have a built-in battery management system, which is sometimes called the “BMS.” Here, all facets of your battery’s functions are operated. Battery monitoring systems evaluate the voltage and current, as well as the temperature. The outside temperature can heavily impact your battery’s health, so monitoring the temperature can help you adjust to prolong its life.
At Ride1Up, we offer a variety of expert displays for purchase, such as the KD21C and the KD218 Display. Ebikes that come with these displays can show you very detailed information about the voltage of your battery and the amperage of your internal control system. In many ways, additional components like the multi-meter have only very specific uses after you’ve invested in your e-bike purchase.
In Conclusion
We recommend investing in a multimeter to test your bike’s battery, and also to choose an e-bike with a BMS already integrated into its battery. Luckily, all Ride1Up ebikes stock batteries with an integrated BMS. With a monitoring system in place, you can receive real-time updates and information about your bike’s battery and intercept issues as they arise.
For more information on expert e-bike maintenance or recommendations for the best electric bikes for basket attachments, check out our latest posts!